DIY Quick & Easy Sensory Bins for Busy Moms
DIY Quick & Easy Sensory Bins for Busy Moms

**Affiliate Disclosure:** This post may contain affiliate links. This means that if you click on one of my links and make a purchase, I may receive a small commission at no additional cost to you. I only recommend products or services that I personally use and believe will be beneficial to my readers. The earnings from these links help support this website and its content. Thank you for your support <3
Table of Contents
Are you a busy mom looking for a fun and engaging way to keep your little one entertained? Sensory bins are the perfect solution! They are simple to create, budget-friendly, and offer endless opportunities for learning and play. Let’s walk through everything you need to know about creating your own DIY sensory bins. Whether you’re new to sensory play or looking for fresh ideas, this guide has you covered.
What is a Sensory Bin?
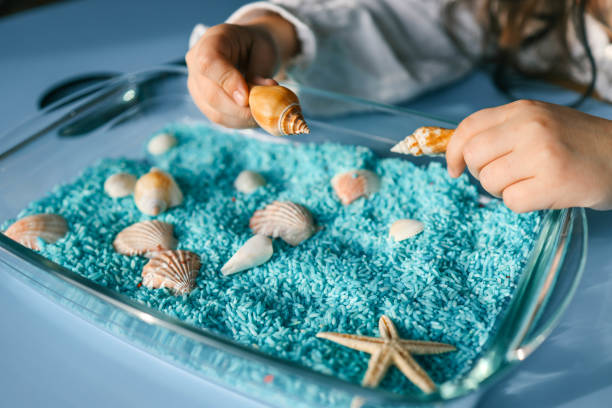
A sensory bin is a container filled with various materials that stimulate your child’s senses. These bins are great for developing fine motor skills, sparking creativity, and helping your child relax. Sensory bins are versatile and can be customized to match your child’s interests and developmental needs. Plus, they are easy to set up and require minimal materials.
Getting Started: Basic Materials You’ll Need
Creating a sensory bin doesn’t require fancy or expensive materials. Here’s a list of basic items to get you started:
- Bin or Container: A plastic storage bin, large bowl, or tray works perfectly as the base of your sensory bin.
- Fillers: Common fillers include rice, dried beans, pasta, sand, water, or cotton balls. These materials provide different textures and sensory experiences.
- Tools & Utensils: Spoons, scoops, tongs, and cups are great for encouraging fine motor skills and hand-eye coordination.
- Toys & Objects: Small figurines (animals, cars, etc.), blocks, pom-poms, buttons, and foam letters or numbers add variety and keep your child engaged.
- Optional Additions: To make the sensory experience even more exciting, consider adding essential oils (for scent), food coloring (to dye fillers), or glitter.

Step-by-Step Setup
Now that you have your materials ready, it’s time to put together your first sensory bin. Here’s a simple step-by-step guide:
- Choose Your Bin: Select a bin or container that is large enough for your child to explore without spilling materials everywhere.
- Add Your Filler: Pour your chosen filler into the bin, enough to cover the bottom. You can use just one type of filler or mix a few for added texture.
- Include Tools & Toys: Add in some fun objects like small toys, spoons, or scoops. These will make the bin more interactive and engaging for your child.
- Customize with Extras: If you want to add a theme, this is the time to include extra elements like colored rice or themed toys (e.g., dinosaurs for a dinosaur dig).
- Play Time: Invite your child to explore the sensory bin. Watch as they scoop, pour, and dig their way through different textures and objects!

Themed Sensory Bin Ideas
Once you have the basics down, you can make your bins even more exciting by customizing them to your child’s interests. Here are a few themed sensory bin ideas to get you started:
- Outer Space Exploration: Fill the bin with black beans or dark-colored rice and add glow-in-the-dark stars, astronaut figures, and toy rockets. Your child can explore the “universe” and learn about planets and stars.
- Safari Adventure: Use green shredded paper or fake grass as the filler and add plastic jungle animals, small trees, and a pair of toy binoculars. This bin lets your child embark on a mini-safari adventure right from home!
- Bug Hunt: Fill the bin with brown rice or dried coffee grounds to mimic dirt, and add plastic bugs, small magnifying glasses, and leaves or twigs. This bug-themed sensory bin is perfect for little explorers who are curious about insects. They can dig through the filler to discover hidden bugs, learn about different types of insects, and practice their fine motor skills by using tweezers to pick up the bugs.
For sensory bins that engage all five senses click here.

Maintaining & Rotating Sensory Bins Without the Stress
To keep sensory play fresh and exciting, it’s essential to rotate your bins regularly and maintain them properly. Here are some tips to help you do just that:
- Easy Storage Solutions: Use containers or bags to store sensory bin materials neatly. This will keep everything organized and make it easy to set up new bins.
- Rotation Strategies: Plan to rotate your sensory bins weekly or monthly to maintain your child’s interest. This also helps keep the play area tidy and prevents you from having to buy new materials all the time.
- Cleaning and Care: Regularly check and clean your bins and materials to ensure they are safe and hygienic for your child to play with. Simple cleaning methods like washing toys and refreshing fillers can make a big difference.

Creating sensory bins is a fantastic way to engage your child in fun, educational play. It’s quick, and easy, and the possibilities are endless. Now it’s your turn—gather your materials, create your first sensory bin, and watch your child’s imagination soar!
If you found these tips helpful, be sure to share this post with other moms looking for creative ways to keep their kids entertained. Happy creating!