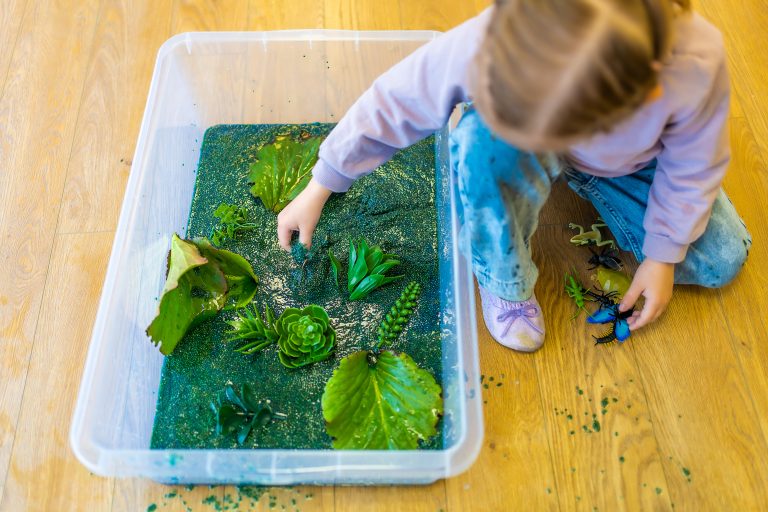
7 Simple Steps to Organize Sensory Bin Supplies Without the Mess

If you’ve ever found rice in your shoes or kinetic sand in your bra (yes, it happens), then you know that sensory play is magical…but also messy. As moms, we want our kids to explore, learn, and stay busy without turning our homes into a glittery war zone. That’s where smart storage and organization come in. In this post, I’m going to show you how to tame the sensory bin chaos—so you can say goodbye to overwhelm and hello to calm, creative playtime.
Whether you have a dedicated playroom or just a corner in the kitchen, these tips will help you store, rotate, and manage your sensory supplies like a pro.
Why Sensory Bin Organization Matters
Before we jump into the bins and baskets, let’s talk about why this matters.
1. You’ll Save Time.
No more digging through drawers for lost scoops or re-buying things you already had. Knowing where everything is makes setup quick and easy.
2. You’ll Reduce Stress.
Clutter can be overstimulating for both you and your child. When sensory supplies are stored well, your space feels calmer—and so do you.
3. You’ll Encourage Independent Play.
If your child can access and help clean up their bins, they’re more likely to use them without needing your help every five minutes. Win-win!
Step 1: Start with a Declutter Session
Before you organize, do a quick inventory.
- Toss anything broken, moldy, or overly sticky.
- Donate or repurpose items your child has outgrown.
- Group like with like (filler materials, tools, themes, etc.).
Grab some laundry baskets and make piles—it doesn’t have to be fancy. Just getting a visual of what you have is a powerful first step.
Step 2: Choose the Right Storage System for Your Space
You don’t need a Pinterest-perfect playroom. Here are realistic options based on common home setups:
1. Plastic Shoe Boxes with Lids
These are affordable, stackable, and perfect for keeping different themes or textures separate.
- Label each one (“Ocean,” “Fall Leaves,” “ABC Bin”) with a sticky label or washi tape.
- Keep a couple filled and ready to go, and rotate them monthly.
2. Rolling Carts (aka the Sensory Station on Wheels)
A 3-tier rolling cart is great for storing tools (tweezers, scoops), filler materials, and ready-to-go bins.
- Easy to wheel into a closet when not in use.
- Assign each level a purpose: Top = tools, Middle = fillers, Bottom = completed bins.
3. Zip Pouches or Gallon Bags for Fillers
For rice, beans, pasta, pom-poms, etc., sealable bags save space and contain mess.
- Store these upright in a bin like file folders.
- Bonus: Write the filler type and “last used” date on the bag if you’re rotating bins monthly.
4. Over-the-Door Shoe Organizers
Perfect for small homes or apartments!
- Use clear pockets to hold mini containers, tools, or small themed items.
- Easy for kids to see and grab what they need.
Step 3: Create Zones or Categories
Think of your sensory stash like a mini-library. Create categories or zones that make sense for your family.
Some popular ideas:
- Filler Materials: Rice, beans, pasta, water beads, kinetic sand
- Tools: Scoops, spoons, tweezers, tongs, cups, sensory brushes
- Themed Sets: Dinosaurs, bugs, ocean, space, letters, seasons
- Calming Play: Lavender rice, soft textures, chill colors
- Messy Play: Foam, slime, shaving cream (store these higher or in sealed tubs)
Having a system means you can build a new bin in 5 minutes flat—no stress, no scrambling.

Step 4: Label Everything
It sounds simple, but labels are magic.
- Use chalkboard labels, index cards, masking tape, or even laminated printable tags.
- Include your child if they’re old enough—they’ll love helping decorate the labels.
Bonus tip: Add a photo of what’s inside to help pre-readers know what they’re picking.
Step 5: Make Rotation Part of Your Routine
Just like toy rotation keeps playtime exciting, rotating sensory bins avoids burnout and overstimulation.
Ideas to rotate by:
- Weekly or bi-weekly
- Monthly theme (Ocean in June, Apple Picking in September)
- Learning focus (fine motor, letters, calming bin, etc.)
Pro tip: Store “off-season” bins in a labeled plastic tote in a closet or under the bed.
Step 6: Keep a Sensory Inventory
If you’re a mompreneur, homeschooler, or just a planner at heart, this step is gold.
Make a simple Sensory Inventory Sheet:
- Bin Name or Theme
- Date Last Used
- Type of Filler
- Tools Needed
- Notes (what worked, what didn’t)
You can even turn this into a printable or keep it on your phone.
Would you like me to make one for you? (Say the word, and I’ll create a freebie!)
Step 7: Get the Kids Involved in Clean-Up
Even toddlers can help clean up with a little practice.
- Use a “clean-up song” to signal when it’s time to start.
- Assign simple jobs: put scoops in the bin, wipe the table, zip the bag.
- Make it part of your routine, just like brushing teeth.
Teaching kids to take ownership keeps the mess manageable—and builds responsibility.
My Favorite Sensory Storage Hacks (from One Messy Mom to Another)
- Colored dot stickers to group themes (blue = ocean, green = nature).
- Use muffin tins to store small parts during play, then dump them right back into the bin when done.
- Keep a mini vacuum or broom nearby for rogue rice.
- Store messy-play-only bins in the bathtub for easy cleanup!
Progress Over Perfection
Mama, your home doesn’t need to look like a Montessori catalog. Organization isn’t about being perfect—it’s about creating ease in your day and space for fun.
You’re doing a beautiful job.
So whether your bins live in a rolling cart or a kitchen cabinet, give yourself credit for making magic out of rice, scoops, and pom-poms. Sensory play doesn’t have to take over your life—you’ve got this!


